Cape Town, South Africa · April 22, 2026
How to Set Up a
Biodiversity Monitoring Protocol
A field guide for people with mud on their boots
Bad monitoring is worse than no monitoring. It consumes budgets, burns out field teams, and produces datasets that cannot answer the questions they were designed to answer — or any questions at all. We have seen five-year programmes that collected exactly one statistically usable data point per year, and ten-year programmes that never defined what a decline would look like. This guide exists so you do not become either of those programmes.
Monitoring is not photography. It is not a species list. It is the systematic collection of data that can detect change over time with a known level of confidence. If you cannot put a number on the change you can detect and the confidence you can detect it with, you do not have a monitoring protocol — you have a field trip.
The good news: designing a protocol that actually works does not require a PhD in biostatistics. It requires clarity about what you are measuring, discipline about how you sample, and the humility to pilot before you commit. Here is how.
What to Monitor
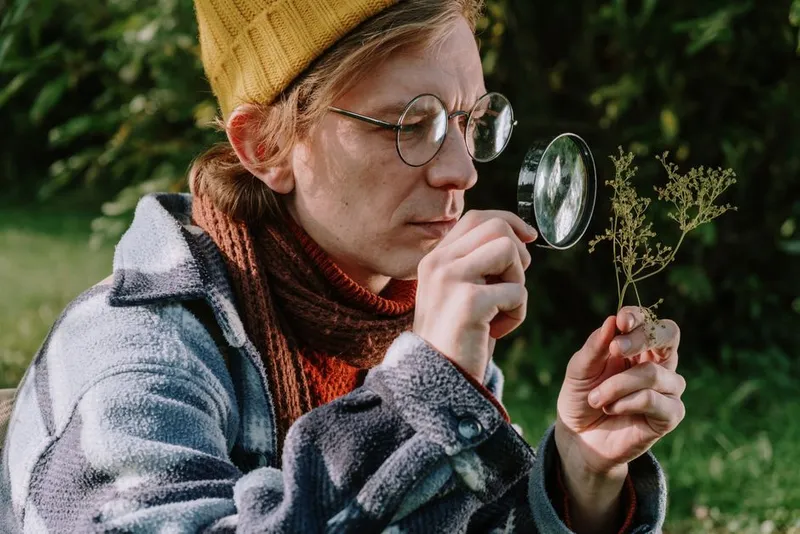
Before you buy a single camera trap, ask yourself: what exactly are you trying to measure? Not “biodiversity” — that is a concept, not a variable. A population trend? A species list? A habitat condition score? The question drives everything that follows, and most programmes fail here, at the starting line, because they never answer it with enough specificity.
There are three defensible approaches. Each has a different purpose, a different cost profile, and a different statistical relationship to the truth.
Approach 1: Indicator Species
Pick two to five species and track them relentlessly. This is the pragmatic approach. You get high statistical power because you are sampling intensively for a small number of targets. You can afford detection probability modelling for each species individually. Your field team develops deep expertise. Your data actually means something.
The key is picking the right indicators. A good indicator species is detectable (you can reliably observe it with your chosen method), sensitive to the pressure you care about (logging, poaching, climate shift), and representative — its response correlates with other species in the community. NEON (the US National Ecological Observatory Network) uses sentinel taxa — ground beetles, mosquitoes, small mammals, ticks, and plants — chosen because each responds to a different axis of environmental change. You do not need NEON’s budget to adopt the logic.
Pros: Statistically powerful. Affordable. Clean data. Cons: What if your indicators miss something? If the pressure you care about is poaching for bushmeat and you monitor only birds, you may detect nothing while mammal populations collapse.
Approach 2: Keystone Species and Process Monitoring
Monitor a species whose presence or behaviour tells you about an ecosystem process, not just a population count. Apex predators tell you about trophic integrity. Seed-dispersing frugivores tell you about forest regeneration. Dung beetles tell you about nutrient cycling.
This approach is harder to quantify than indicator species monitoring but can be more meaningful. The presence of a breeding pack of African wild dogs tells you something about prey density, habitat connectivity, and human pressure that a count of all 47 bird species in the area does not. The limit is that process interpretation requires expert knowledge and is difficult to automate or scale.
Approach 3: Full Taxonomic Surveys (“Everything”)
This is the seductive one. Deploy every method. Count every taxon. Build the definitive species list. It sounds comprehensive. It is usually a mistake.
A full survey dilutes effort across too many targets to achieve statistical power for any one of them. You end up with presence data for 300 species and trend data for zero. If you cannot afford detection probability modelling for every species in your list — and almost nobody can — do not pretend you are monitoring all of them. Call it what it is: an inventory. An inventory tells you what is there. Monitoring tells you what is changing. These are different activities, and confusing them is the single most expensive mistake in conservation science.
Our advice: Start with indicator species. If you have the budget, add one keystone process. Leave the everything survey for your baseline year — do it once, well, and use it to select your indicators.

How to Sample
You know what you are monitoring. Now: how do you actually collect the data? The method must match the question, and no method is perfect. Every sampling technique has a detection bias — a set of species it sees well, a set it sees poorly, and a set it misses entirely. Understanding these biases is more important than the method itself.

| Method | Best For | Pros | Cons |
|---|---|---|---|
| Line transects | Large mammals, birds in open habitat, primates | Well-established statistical framework (distance sampling). Repeatable. Low equipment cost. | Requires skilled observers. High labour cost. Detection falls with distance — the animals you miss are not random. |
| Point counts | Birds, amphibians (acoustic) | Simple to standardise. Good for community-level trends. Volunteer-friendly. | Detectability varies dramatically with vegetation density, time of day, and observer skill. Not suitable for cryptic or nocturnal species. |
| Camera trap grids | Medium to large terrestrial mammals, ground birds | Works 24 hours. Permanent record for verification. No observer bias. Density estimation via capture-recapture for marked species. | Equipment cost ($200–600/unit). Theft and elephant damage are real. Data processing is substantial — thousands of images to classify. Fails for arboreal and small-bodied species. |
| Acoustic recording | Birds, bats, amphibians, orthoptera, marine mammals | Low-cost hardware (AudioMoth ~$60). Permanent record. Multi-taxon from single device. Automated analysis improving rapidly. | Battery and storage management. Automated classifiers are good but not perfect — false positives and negatives require validation. Performance drops in high-wind and rain. |
| eDNA | Aquatic vertebrates, invertebrates, some terrestrial taxa via soil/air | Detects species that evade all other methods. One water sample can detect dozens of fish species. Rapidly maturing technology. | Contamination risk is real and consequential. Cannot estimate abundance (yet). Reference libraries incomplete for many regions. Lab costs are significant — $50–200/sample. Requires cold chain. |
Camera Trap Grids in Detail
Camera traps have become the default tool for terrestrial mammal monitoring. They should not be the automatic choice — transects and acoustic methods are cheaper and more appropriate for many taxa — but when mammals are your target, camera traps are the best tool we have.
The gold standard is the TEAM (Tropical Ecology Assessment and Monitoring) protocol: 60 camera trap points per array, arranged in a systematic grid with 1 km spacing between points, deployed for a minimum of 30 consecutive days per season. This density and duration is not arbitrary — it is the product of power analysis that established the minimum effort required to detect a 5% annual change in occupancy for medium-to-large terrestrial mammals over a 5-year period. The TEAM network has run this protocol across 17 sites on three continents since 2009, and the protocol documentation is public, peer-reviewed, and free.
If 60 cameras sounds like a lot: it is. The TEAM protocol was designed for sites of 100–300 km². Most smaller programmes adapt it — 20–30 cameras, 30-day deployments, 1 km minimum spacing. The spacing matters more than the count. Cameras too close together are not independent sampling units; you are photographing the same animals and calling it replication. This is a statistical error, not a budget choice.
Spatial Design
Random is better than convenient. Always. Trails and roads are easy to walk but they are not random samples of the landscape — they follow topography, avoid thick vegetation, and attract different animal behaviour than off-trail habitat. A random or systematic grid will be harder to deploy and will produce data that you can actually analyse. The convenient sample will be easier and will produce data that statisticians will reject.
If you must use trails for access, offset your sampling points by a consistent distance — 50 to 100 metres perpendicular to the trail. This is not perfect (it still biases toward trail-adjacent habitat) but it is better than placing cameras on the trail itself.
Pilot Everything
Before you commit to a protocol, run one full pilot season. Deploy your chosen method at your chosen density and duration. Analyse the pilot data for detection rates, species accumulation curves, and coefficient of variation. Ask: can this design actually detect the magnitude of change I care about? If the answer is no — and it often is on the first attempt — adjust the density, the duration, or the target species, and pilot again. One pilot season costs less than five years of useless data.
How Often
Seasonality drives detectability. In the wet season, vegetation is dense, animals disperse, and your cameras photograph leaves moving in the wind. In the dry season, animals concentrate at water sources and your detectability spikes. Neither season is “better” — but you must sample consistently across seasons, or your trend line will reflect the weather, not the population.
Minimum Viable Design
For a programme that can detect a 30% decline over 10 years with reasonable statistical power (80%), you need:
- 30–50 independent sampling units (camera points, transect segments, acoustic stations). Fewer than 30 and your confidence intervals will be too wide to detect anything short of a population crash.
- Annual surveys at minimum. Biannual (wet/dry) is better. Quarterly is a luxury. The trend you can detect is a function of the number of data points in time, not just space.
- At least 3–5 years of data before your first trend analysis. Population time series are noisy. Two data points — year one and year two — tell you nothing about a trend. They tell you about the difference between two particular field seasons.
Occupancy Modelling
The most important paper in monitoring methodology is MacKenzie et al. (2002): Estimating site occupancy rates when detection probabilities are less than one. Before this paper, monitoring programmes treated “not detected” as “absent.” That assumption is wrong. Detection probability (p) is almost never 1.0. If p = 0.5 and you visit a site once, you will miss a present species half the time. Five visits gets you to a 97% chance of detecting it if it is present. Occupancy models separate the biological process (occupancy ψ) from the observation process (detection p) using repeat visits. This is not an advanced option — it is the minimum standard for credible monitoring.
The practical implication: your protocol must include repeat surveys at each sampling unit within a season. Three to five repeat visits (or 3–5 independent sampling occasions within a 30-day deployment for cameras) is the typical minimum for occupancy modelling. If you visit each site only once per season, you cannot model detection probability, and you cannot separate true absence from failed detection. Your occupancy estimates will be biased low, and the bias will vary with conditions you are not measuring.
Document Every Protocol Change
You will change your protocol. New cameras will have different trigger speeds. A new observer will join the team. A road will wash out and you will shift a transect. Every change, documented, is a covariate in your analysis. Every change, undocumented, is a confounding variable that may invalidate your entire trend estimate. Keep a protocol log. Date every entry. It will save your dataset.
What Tools to Use
Tools do not design your protocol — but the wrong tool will break it. A field app that crashes when you have no signal, a GPS that runs out of battery at noon, a camera trap whose trigger speed misses every animal that walks past — these are not inconveniences. They are data loss events. Here is an honest assessment of the hardware and software that field programmes actually use, with no vendor enthusiasm.
Data Collection Apps
CyberTracker — The original. Icon-based interface built for illiterate San trackers in the Kalahari in 1996. Still works offline. Still free for conservation. Still respected. The desktop component requires Windows and looks like it. The mobile interface has not been significantly modernized in a decade. Data export is clunky. If you work in Southern Africa and your field team is comfortable with the icon paradigm, CyberTracker is a proven choice. If you are starting from scratch elsewhere, there are smoother options.
ODK (Open Data Kit) — The standard for form-based data collection. Build forms in XLSForm (Excel), deploy to Android via ODK Collect. Free if you self-host. ODK Cloud starts at $199/month for 10K submissions. Massive community, rigorous data validation, offline sync. The trade-off: ODK is a form engine, not a wildlife tool. There are no built-in species lists, no tracking protocols, no field guides. You build everything. If you have the technical capacity to design your own forms and you need bulletproof data validation, ODK is excellent.
SMART Mobile — Purpose-built for ranger patrols and conservation law enforcement. Developed by WWF, WCS, ZSL, and others. End-to-end patrol management: plan routes, log observations, document illegal activity, generate reports. Free and open-source. Heavy to set up — SMART is a full desktop application plus mobile app plus server component. Training required. If you are managing a protected area with formal patrol mandates, SMART is the tool. If you are doing general ecological monitoring, it will feel like driving a fire engine to the grocery store.
Field Log — Built by The Field Company for field-first observation logging. Offline-first. Real-time team sync when you have signal. Structured forms and rapid logging modes in the same app. Export to CSV and GIS formats. Designed for the rhythm of fieldwork rather than the requirements of a server room. Free tier available. Does not yet have ODK’s template library or iNaturalist’s computer vision. Best for conservation field teams who need their observations to end up in a usable dataset without fighting the tool.
Camera Trap Hardware
| Brand | Price (USD) | Trigger Speed | Notes |
|---|---|---|---|
| Browning (Strike Force, Spec Ops) | $150–250 | ~0.3s | Best value for most programmes. Fast trigger, good battery life, reliable in humidity. The Spec Ops Elite HP5 is the current workhorse recommendation. |
| Reconyx (HyperFire 2) | $500–650 | ~0.2s | Industry gold standard. Built for decade-scale deployments. No-glow IR is genuinely invisible. If you need data continuity across a 10-year programme, Reconyx is the benchmark. |
| Bushnell (Core, Prime, CelluCore) | $100–300 | ~0.3–0.6s | Widely available. Cellular models (CelluCore) enable near-real-time data retrieval. Build quality is variable — some units last years, some fail in months. Test your batch. |
| Cuddeback (CuddeLink system) | $200–400 | ~0.25s | Mesh networking between cameras — one cellular uplink serves up to 24 cameras over radio. Reduces cellular costs dramatically. Proprietary network; you are locked in. |
Acoustic Recorders
AudioMoth (~$60/unit) is the breakthrough device. Developed by Open Acoustic Devices, it is tiny, cheap, and capable. You can deploy 50 AudioMoths for the price of one professional recorder. The trade-offs: waterproofing requires a third-party case, battery life tops out around 2–4 weeks depending on duty cycle, and the onboard clock drifts enough to matter for synchronisation. For most field programmes, these trade-offs are worth it.
Wildlife Acoustics Song Meter ($500–1,000/unit) is the professional option. Weatherproof housing, scheduled recording, programmable gain, GPS-synced clock, months of deployment on AA batteries. If you need acoustic data from a remote ridgeline during monsoon season and you cannot afford a failed deployment, this is the tool. The SM4 and Mini are field-proven across every continent.
GPS Collars and Telemetry
GPS collars are not monitoring — they are a specialised subset of it. They tell you about movement, home range, and survival of individual animals. They cost $800–5,000 per collar plus satellite or cellular data fees. They require animal capture, which requires veterinary expertise, ethical approval, and significant risk. They are essential for some questions — corridor use, human-wildlife conflict, mortality causes — and an expensive distraction for others. Do not put a collar on an animal unless the collar answers a question that no other method can answer.
What to Do With the Data
You have spent three field seasons collecting data. Now what?
Most monitoring programmes treat data management as something that happens after fieldwork. This is a mistake. Your analysis pipeline should exist before your data does. Write the analysis script first, with simulated data. If you cannot write the script, you do not understand the question well enough to design the protocol. This sounds backwards but it is the single highest-leverage thing you can do before entering the field.
Metadata Is Not Optional
A dataset without metadata is a collection of numbers with no meaning.
Two years from now, someone — possibly you — will open a CSV called
camera_data_final_v3_corrected.csv and have no idea what
the columns represent, which protocols were used, or whether the dates
are in DD/MM or MM/DD format. Metadata prevents this.
Use Darwin Core terms for biodiversity data. Darwin
Core is the standard vocabulary maintained by Biodiversity Information
Standards (TDWG). It defines exactly what goes in fields like
occurrenceID, eventDate,
decimalLatitude, scientificName, and
basisOfRecord. Using these terms means your data is
interoperable with every major biodiversity database on Earth from day
one. It also means someone else’s parser will understand your data
without a phone call.
For dataset-level description, use EML (Ecological Metadata Language). An EML file describes the who, what, when, where, and why of your dataset: project abstract, methodology, geographic coverage, taxonomic coverage, temporal coverage, personnel, and data table structure. EML is the standard that GBIF, DataONE, and most ecological data repositories require. Writing an EML document takes an afternoon. Not writing it costs years of data reusability.
The Analysis Pipeline
Your analysis pipeline should answer the specific question your protocol was designed around. For most monitoring programmes, the pipeline looks roughly like this:
- Data validation — check for missing values, duplicate records, coordinate outliers, date inconsistencies. Automate this. Manual validation is error-prone and nobody does it consistently after month three.
- Detection histories — construct the matrix of detections/non-detections per species per site per sampling occasion. This is the input to occupancy models.
- Occupancy or abundance estimation — estimate
occupancy (ψ) with detection probability (p), or density (D) via
distance sampling or spatial capture-recapture. The R package
unmarkedhandles occupancy,Distancehandles distance sampling,secrhandles spatial capture-recapture. - Trend analysis — model the change in occupancy,
abundance, or species richness over time, accounting for covariates
(season, observer, habitat). The R package
rtrimis purpose-built for wildlife trend analysis with missing data. - Reporting — produce estimates with confidence intervals, not just point estimates. A trend of -3% per year with a 95% CI of [-8%, +2%] is telling you something different from a trend of -3% with a CI of [-4%, -2%]. The first is noise. The second is evidence.
GBIF and the Kunming-Montreal Framework
Publishing your data to GBIF (Global Biodiversity Information Facility) is the standard for making biodiversity data discoverable and citable. GBIF requires Darwin Core formatting, a data licence (CC0, CC BY, or CC BY-NC), and an EML metadata document. Publication gives your dataset a DOI — it becomes a citable scientific output, not just an internal report.
The Kunming-Montreal Global Biodiversity Framework (2022) includes 23 targets and a monitoring framework with headline indicators. Target 4 requires parties to “halt human-induced extinction of known threatened species.” Target 21 requires “the best available data, information and knowledge” to be accessible to decision-makers. If your monitoring programme produces Darwin Core-compliant data published to GBIF, you are contributing directly to the global indicators that will be reported against in 2030 and 2050.
Common Mistakes
Every one of these we have made, seen made, or been asked to rescue a programme from.
1. No Pilot Season
A programme in northern Mozambique deployed 40 camera traps across 200 km² before testing a single unit. The trigger speed of the cameras they bought was 1.2 seconds — slow enough that an elephant walking at normal pace passed through the detection zone without triggering a single frame. They discovered this after 90 days of deployment. Total data: eleven photographs of grass blowing in the wind. A single camera, placed in the backyard for a week, would have revealed the problem. Cost of the pilot: $200 and seven days. Cost of the error: $12,000 and a lost field season.
2. Inconsistent Protocols
A mammal monitoring programme in East Africa changed camera models between year two and year three. The new cameras had a wider detection zone and a faster trigger. Detection rates increased 40% across all species. The programme reported a “dramatic recovery” of the mammal community to its donors. The actual change in animal abundance was statistically indistinguishable from zero — the cameras were simply better at detecting them. Protocol consistency is not optional. If you must change equipment, run a paired calibration study so you can statistically correct for the difference.
3. Ignoring Detectability
A wetland bird survey in Southeast Asia counted birds seen during a single dawn visit to each site, once per year, for seven years. The raw counts declined 35%, and the programme reported a crisis. When occupancy modelling was applied retroactively — using multiple observers and weather covariates as proxies for detection — the decline disappeared. Bird numbers were stable. Visibility had declined because reed beds were growing denser due to reduced grazing pressure. The birds were still there; the observers simply could not see them. This is not a rare edge case. This is what happens when you treat “not detected” as “absent.”
4. Collect Now, Figure Out Later
A biodiversity survey in West Africa collected 14,000 camera trap images across 80 sites. The images sat on an external hard drive for four years because no one had budgeted for the time required to classify them. When a graduate student finally took on the work, the original field team had dispersed, the field notes were lost, and 30% of the images could not be geolocated because the camera metadata format had changed between firmware versions. Classifying camera trap images takes roughly 30–60 seconds per image when done properly. At 14,000 images, that is 120–240 hours of labour — three to six weeks of full-time work. Budget for it before you deploy the cameras, or do not deploy the cameras.
5. No Decision Pathway
Monitoring exists to inform decisions. If your protocol detects a 30% decline in your indicator species, what happens next? Who is notified? What action is triggered? Within what timeframe? If you cannot answer these questions, you are not monitoring — you are documenting decline.
Write the decision pathway before you start. At minimum: define the trigger (e.g. 20% decline in occupancy over three years, p < 0.05), the response (e.g. increase anti-poaching patrols, close area to grazing, commission targeted study), the responsible party (named person, not “the management committee”), and the timeline (e.g. response initiated within 30 days of analysis completion). A monitoring programme without a decision pathway is a report that sits on a shelf while the thing it was monitoring disappears.
What This Costs
Real numbers. No grant-writing optimism. All figures in USD at 2026 prices, exclusive of international travel and institutional overhead.
Tier 1: $500 — The Bare Minimum
What you get: One pilot season of point count or transect surveys for a single taxon (birds or large mammals). One or two field technicians. Clipboard and datasheets — no electronic equipment. Analysis in R or Python on a personal laptop. One site, one season, one question.
Equipment: Binoculars ($100), GPS unit or smartphone ($0–150), field guides ($50), notebooks ($20), local transport ($180).
What you can detect: Large changes (50%+ decline) in common species at a single site. Species list for the site. Baseline for a future proper programme.
Limitations: No detection probability modelling. No camera traps. No occupancy analysis. No trend detection for anything subtle. This is a pilot, not a monitoring programme. Do not call it one.
Tier 2: $5,000 — A Working Programme
What you get: One full field season of camera trap or acoustic monitoring at one site, with occupancy modelling and a written report. Two to four field technicians for deployment and retrieval. Basic analysis pipeline in R. One repeat season (wet/dry) if acoustic.
Equipment: 10–15 Browning camera traps ($1,500–3,750) or 15–20 AudioMoths ($900–1,200), SD cards ($50–100), rechargeable AA batteries and charger ($150), Pelican cases or dry bags for transport ($200), GPS unit ($150), smartphone for data collection with Field Log or ODK (free), local transport and field rations ($800–1,500), basic data processing labour ($500).
What you can detect: 30% occupancy change over 3–5 years for medium-to-large mammals or vocalising birds. Species accumulation curves. Activity patterns. First occupancy estimates with confidence intervals.
Limitations: Single site means no inference beyond that site. Limited statistical power for rare species. Image classification is a time sink — budget for it. Equipment failure and theft will claim 10–20% of your units, and $5,000 does not include a replacement buffer.
Tier 3: $50,000 — A Multi-Year Programme
What you get: Two to three field seasons across two or three sites, with multiple methods (camera traps + acoustics + eDNA pilot). Occupancy and trend modelling. Dedicated data manager. GBIF publication. Decision pathway integrated with management.
Equipment: 30–60 camera traps — mix of Browning and Reconyx ($8,000–25,000), 20–40 AudioMoths ($1,200–2,400), 2–4 Wildlife Acoustics Song Meters for acoustic standardisation ($1,000–4,000), GPS units and satellite communicator ($500–800), ruggedised tablets or phones for data collection ($500–1,000), eDNA sampling kits and lab costs for 200 samples ($10,000–15,000), weather station for site-level covariates ($500), battery chargers, SD cards, spare parts, protective cases ($1,500).
Personnel: Field team leader (3–6 months/year), 2–4 technicians, 1 data manager (part-time), 1 statistician or ecologist for analysis design (consulting). Local field assistants are essential and should be paid, not volunteered.
What you can detect: 10% annual occupancy change over 5 years. Multi-species trends. Relationships between species occurrence and habitat covariates. Community-level change. All with publishable confidence intervals.
Hidden Costs
Things that appear in nobody’s budget and consume everybody’s:
- Equipment replacement: Budget 15–20% of your hardware cost annually. Cameras fail. Ants colonise them. Elephants investigate them. Floods take them. This is not exceptional — it is the average.
- Batteries: A 30-camera grid running 30-day deployments consumes roughly 360 AA batteries per deployment. At $0.50 per lithium AA, that is $180 per season just for batteries. Rechargeable AAs cost more upfront and less over time but require charging infrastructure and spares. The logistical overhead of managing this at a remote field site is real.
- Data processing labour: Image classification is the silent budget killer. If you collect 50,000 images per season and each takes 30 seconds to classify, you need 416 hours — roughly 10 weeks — of focused work. That is a person. Budget for them or use automated classifiers (MegaDetector, Wildlife Insights) and accept that you will still need manual validation on 5–10% of detections.
- Data storage and backup: A single camera trap deployment can produce 100–500 GB of images and video. Across three seasons, two sites, and raw + processed copies, you are looking at 2–10 TB. Cloud storage costs $5–25/TB/month. Hard drives fail. Budget for redundant, geographically separated backups.
- Permits and community agreements: Research permits, park access fees, community consent processes — these are not free and the lead time is measured in months, not weeks. Start the permit process before you buy equipment.
Start Here
A checklist, because monitoring is complicated enough without having to remember what comes next.
Define your question. Not “monitor biodiversity.” A specific, quantifiable question: “Is the occupancy of duiker declining by more than 5% per year in the northern block?” Write it down. If you cannot write it in one sentence, the question is not clear enough to design a protocol around.
Choose your indicators. Two to five species. For each, verify that your chosen sampling method can reliably detect it, that it is sensitive to the pressure you care about, and that its response is representative of the community. If you are not sure, spend a pilot season finding out.
Select your method. Match method to question and taxa. Camera traps for terrestrial mammals. Acoustic recorders for bats and birds. Line transects for large mammals in open habitat. eDNA for aquatic systems. Do not default to camera traps because everyone else uses them.
Run a power analysis. With your estimated detection probability and expected effect size, calculate whether your proposed sampling intensity can detect the change you care about. The R package
dsopdoes this for distance sampling.unmarkedincludes simulation tools for occupancy. If the power analysis says no, increase your sampling intensity or adjust your question before you go to the field.Pilot for one full season. Test your method, equipment, data pipeline, and team logistics under real field conditions. Analyse the pilot data. If detection rates or species accumulation curves reveal gaps, iterate and pilot again. One pilot season costs less than five years of useless data.
Build the analysis pipeline before data collection starts. Write the scripts. Simulate the data. Confirm that the pipeline produces sensible estimates with known inputs. If you hit a statistical problem during the pilot, you can fix the protocol. If you hit it during year four, you have four years of data you cannot analyse.
Document everything. Write the protocol in a document that someone who was not at the planning meeting can follow. Include: sampling design rationale, equipment specifications and settings, field data collection forms, data management plan, analysis pipeline description, decision pathway with triggers and responsibilities. This document is your programme’s memory.
Collect data consistently. Same season, same duration, same equipment configuration, same observer training standards, every year. If something changes, document it in the protocol log on the day it changes. A documented change is a covariate. An undocumented change is a confounding variable that may invalidate your trend.
Analyse and report annually. Do not wait five years to look at the data. Annual analysis catches protocol drift, failing equipment, and unexpected trends while there is still time to respond. An annual report also keeps donors and stakeholders engaged and your team accountable to the data, not just the fieldwork.
Publish to GBIF. Format your data with Darwin Core terms. Write an EML metadata document. Choose a licence. Publish. Your dataset gets a DOI. It becomes part of the global biodiversity evidence base. Someone you will never meet will use your data to answer a question you never thought to ask. This is how science works.
Monitoring is not glamorous. It is repetitive, logistically demanding, and statistically humbling. It will not trend on social media. It will not win awards. But it is the only way to know whether anything we are doing — the protected areas, the restoration projects, the policy interventions, the billions of dollars spent on conservation every year — is actually working. If we are not measuring, we are guessing. And guessing is not good enough for the species we are trying to keep on this planet.
Field Log is a field-first mobile platform built by The Field Company for the work described in this guide. Offline-first. Team sync. Structured forms and rapid logging. It is free to start and your data stays yours. Get started at fieldlog.thefieldco.com. For more on building conservation technology that respects the people doing the fieldwork, visit A Letter to Humanity .